Why a Systematic Setup Routine Matters
Arriving at a campsite after a long drive can make it tempting to skip steps or do things out of order. But RV setup has a logical sequence that protects both your rig and your comfort. An unlevel RV stresses slide-out mechanisms, causes refrigerator cooling failures, and makes doors and drawers difficult to open. Improper electrical connection can damage sensitive electronics. A sewer hose connected before leveling is complete may pull loose when the rig shifts.
Whether you're new to camping or transitioning to full-time RV life - see our guide on transitioning to full-time RV life for broader context - a repeatable setup routine becomes second nature quickly. The steps below apply broadly across Class A, B, and C motorhomes and most towable campers; always cross-reference your owner's manual for model-specific instructions.
What you will need
Tools and Equipment You'll Need
Having the right gear on hand before you arrive eliminates scrambling. The items below cover the essentials for a full-hookup site. If you're camping at a site with only partial or no hookups, some items won't apply - but carrying them regardless means you're prepared for any site.
Wheel Chocks
Prevent the RV from rolling while unhitched or during leveling.
Leveling Blocks or Ramps
Raise one side or end of the RV to achieve a level position on uneven ground.
Bubble Level or Digital Level
Confirm the rig is plumb before deploying stabilizers or connecting utilities.
30/50-Amp Shore Power Adapter
Match your RV's power inlet to the campground pedestal if amperages differ.
Surge Protector / EMS
Protect your RV's electrical system from power surges and low-voltage conditions at the pedestal.
Drinking-Water Hose
Deliver potable water from the campground spigot to your RV's city water inlet.
Sewer Hose Kit with Support
Carry waste from your RV drain valve to the site's sewer inlet safely.
Work Gloves
Protect hands during sewer hose handling and connection.
For a deeper dive into what to inspect and verify each time you arrive at a new site, the RV arrival checklist is a useful companion to these steps.
Step-by-Step: Leveling, Hookups, and Stabilization
Follow these steps in order. Skipping ahead - connecting sewer before leveling, for instance - often means undoing work when the rig shifts. Budget 20 to 45 minutes for your first few setups; experienced campers typically complete the process in under 20 minutes.
Scout and position your RV on the site
Before cutting the engine, walk the pad briefly. Note the slope direction, any low-hanging branches that could hit slides or vents, and where the hookup pedestal and sewer inlet are located. Pull forward so your utility connections reach comfortably - most sites place the pedestal at the rear driver's side. For towables, take your time backing in; a spotter using agreed hand signals reduces stress and avoids costly repositions.
Chock the wheels
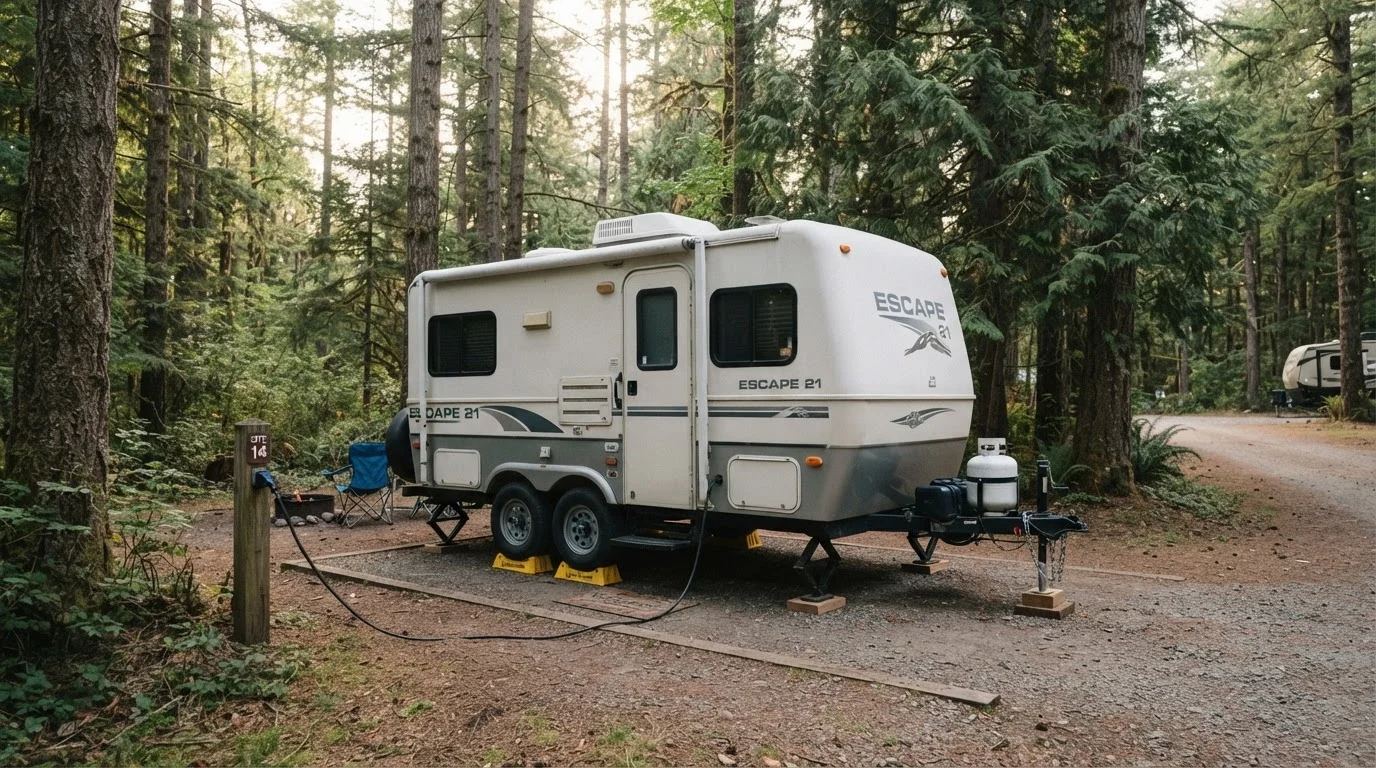
With the RV in its final position and the parking brake set (on motorhomes), place chocks snugly against both sides of at least one drive axle wheel - front and rear faces. For towables, chock immediately after unhitching; never rely on the tongue jack alone to hold the trailer. Chocks should sit flush on a hard surface; on dirt or gravel, place a board underneath to prevent them from digging in and losing grip.
Level side-to-side using blocks or the leveling system
Side-to-side (lateral) level must come first. Use your bubble level or in-dash display to determine which side is low, then drive or back the low-side tires onto stacked leveling blocks. Recheck the level and add or remove blocks as needed. Automatic leveling systems handle this electronically - follow your rig's manufacturer procedure, as sequences vary. Aim for within one degree of level; refrigerators using absorption cooling require near-perfect lateral level to function correctly long-term.
Level front-to-back using the tongue or front jack
Once the rig is laterally level, adjust pitch (front-to-back). On towables, crank the tongue jack up or down. On motorhomes with front or rear auto-leveling jacks, use the system's controls. Check your level again after each adjustment - lateral and pitch interact slightly. Most manufacturers recommend a very slight nose-down pitch (roughly half a bubble low in front) to encourage condensate drainage, but confirm this against your owner's manual.
Deploy stabilizer jacks
Stabilizer jacks are not leveling jacks - they touch the ground to reduce bounce and sway, not to bear the rig's full weight. Lower corner jacks or rear stabilizers until they make firm contact with the ground; use stabilizer pads under the feet to spread load and prevent sinking on soft surfaces. Do not crank them until the rig lifts - you risk bending the jack or damaging the frame.
Connect fresh water
Attach a water pressure regulator to the campground spigot first - campground pressure can exceed 80 PSI and damage your RV's plumbing, which is typically rated for 45-65 PSI. Thread your drinking-water hose onto the regulator, then connect the other end to your RV's city water inlet. Turn on the spigot slowly and check both ends for leaks. If you plan to use your onboard tank instead, fill it from the spigot using the gravity fill port rather than pressurizing the city inlet.
Connect shore power safely
Plug your surge protector or EMS into the campground pedestal first - before connecting it to your RV. This lets the device verify the pedestal's wiring for faults (reverse polarity, open ground) before power flows to your rig. Once the EMS shows a green light or clear status, connect the RV end. If the pedestal's amperage doesn't match your rig's inlet, use the appropriate adapter (e.g., 30-to-50 amp). For rigs without an EMS, at minimum use a basic surge protector.
Connect the sewer hose
Put on gloves before handling any sewer equipment. Attach the bayonet fitting of your sewer hose firmly to your RV's drain outlet - the gray and black tank valves should be closed at this point. Run the hose downhill to the site's sewer inlet and secure it with the inlet's rubber collar or a donut seal to contain odors and splashback. Use a sewer hose support to maintain a continuous downhill slope; a sagging hose traps solids. Keep tank valves closed until you're ready to dump - never leave the black tank valve open, as liquid drains away and solids accumulate into a difficult-to-clear blockage.
Build a Site-Setup Checklist Card
Write your personal version of these steps on a laminated card and keep it in your tow vehicle or driver's seat pocket. A physical checklist prevents the most common omissions - especially when you arrive tired or after dark. Pair it with the full RV arrival checklist for a comprehensive arrival routine.
If you're still deciding what kind of rig suits your travel style, our overview of RV types and classes can help you understand how setup complexity varies across vehicle categories.
Common Setup Mistakes and How to Avoid Them
Even experienced RVers occasionally shortcut the process with costly results. The most common errors fall into three categories:
- Stabilizing before leveling: Stabilizer jacks set on an unlevel rig simply hold it in the wrong position. Always confirm level first.
- Leaving the black tank valve open: This is one of the most damaging habits in RV ownership. Liquid drains continuously while solids build into a hardened blockage that requires significant effort - and sometimes professional service - to clear.
- Skipping the surge protector: Campground pedestals vary widely in power quality. A single voltage spike can damage inverters, converters, and appliances. An EMS provides both spike and low-voltage protection.
Shore Power Faults Are More Common Than You'd Think
Campground electrical infrastructure ranges from well-maintained to severely deteriorated. Reverse polarity and open-ground faults are frequently detected at older parks. An Energy Management System (EMS) - not just a basic surge strip - will identify these wiring faults before you connect and can prevent damage that a simple surge protector would miss. Consider it non-optional equipment for extended or full-time camping.
For those comparing the RV lifestyle against more rugged off-grid approaches, our article on overlanding vs. RV camping walks through how setup demands differ between the two.