Why Bikepacking Bags Work Differently From Panniers
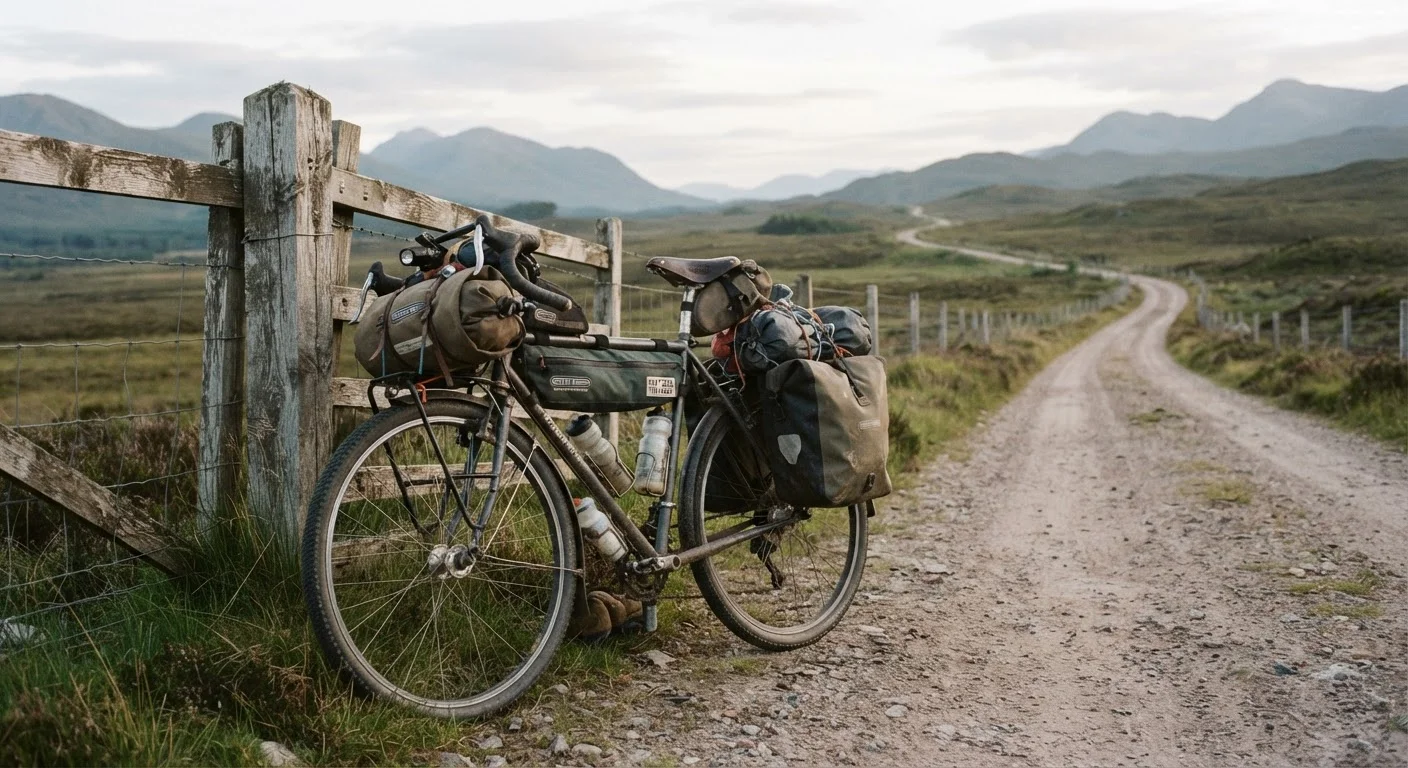
Bikepacking bags - frame bags, handlebar rolls, saddle bags, and top-tube bags - attach directly to the bicycle's frame and contact points rather than to a rack bolted above the wheels. This keeps load closer to the bike's mass center and lower to the ground, which generally improves handling on variable terrain compared to high-mounted panniers.
That said, each system involves real trade-offs. Panniers offer greater total volume and easier access, while bikepacking setups are more compatible with bikes that lack rack mounts and tend to handle better off-road. See our comparison of panniers, trailers, and cargo bikes for a fuller breakdown of when each approach makes more sense.
For those just starting out with multi-day riding, it's also worth reading our cycle touring introduction, which covers route planning and bike selection before you commit to a packing system.
Frame bag
Fits inside the main triangle of the frame; ideal for dense, heavy items like tools, tubes, and food.
Handlebar roll or harness
Mounts to the handlebar and holds bulky, lightweight items such as a sleeping bag or bivvy.
Saddle bag (dropper or fixed)
Attaches under the saddle for sleeping pad, tent, or spare clothing.
Top-tube bag
Small bag on the top tube for quick-access items: snacks, phone, lip balm.
Fork cage or drybag straps
Mounts water bottles or gear rolls to fork legs, adding capacity without affecting main triangle space.
Drybag liners (various sizes)
Waterproof liners protect sleeping bag, clothing, and electronics inside any bag.
Compression straps
Cinch down handlebar and saddle rolls to prevent shifting and reduce aerodynamic drag.
How to Pack Your Kit Step by Step
What you will need
Audit and weigh your gear before it touches a bag
Lay every item on a table and weigh it. This step feels tedious but pays off immediately: most first-time bike packers discover they've assembled 5-8 kg more than they need. Cut mercilessly - clothing layers that overlap in function, redundant tools, comfort items that won't earn their weight after day two. A typical three-season kit for a 3-5 day tour should fit within 10-14 kg total, including water and food.
Assign each item to a bag position based on weight and access frequency
Follow a simple hierarchy: heavy and rarely needed → frame bag (lowest center of gravity); bulky and light → handlebar roll or saddle bag; frequently accessed → top-tube bag or outer pockets. Avoid putting anything heavy in the handlebar position - that's the most destabilizing location on the bike.
- Frame bag: tools, spare tubes, multi-tool, fuel canister, dense food (nuts, energy bars)
- Handlebar roll: sleeping bag, down jacket, lightweight shelter components
- Saddle bag: sleeping pad, tent body/fly, spare clothing
- Top-tube bag: phone, snacks, sunscreen, small first-aid items
Waterproof independently, then pack into bags
Do not rely on the bag's outer material alone for water protection. Use dedicated drybags or compressor sacks inside every storage position. Sleeping bag and insulation layers are the most critical - wet insulation provides negligible warmth and adds significant weight. Electronics go into a separate small drybag before entering the top-tube or frame bag.
Roll drybags using the fold-and-clip method rather than just twisting the top - a proper seal resists submersion, not just rain splash.
Attach bags to the bike and secure all straps
Mount the frame bag first - it's the most structurally integrated and affects how other bags sit. Then fit the saddle bag, followed by the handlebar harness and roll. Check that no strap, buckle, or webbing tail can contact a wheel, chain, or brake rotor. Spin each wheel by hand before moving to confirm clearance. Tighten compression straps on the handlebar roll firmly: a loose roll shifts laterally under braking and can contact the front wheel.
Balance the load side to side
Pick up the rear of the bike by the saddle and let it hang - it should sit roughly level side-to-side. Significant lean indicates uneven packing in the saddle bag or handlebar roll. Redistribute items until the bike hangs reasonably balanced. This is especially important for handlebar rolls, where a lopsided sleeping bag creates a consistent pull on one side of the steering.
Conduct a loaded test ride and adjust
Ride your full kit for at least 10 miles before the tour begins. Pay attention to: steering weight (too heavy suggests overloaded front end), any rubbing or rattling from bags contacting frame or wheel, and access - can you reach your rain jacket without stopping? Adjust strap tension, reposition items, and re-evaluate anything that creates noise or contact. A properly packed bike should feel planted and predictable, not nervous or wallowy.
Always Test Load Before Departure
A bike that handles perfectly unladen can feel sluggish, twitchy, or difficult to brake with 15 kg of gear attached. Ride at least 10 miles fully loaded - ideally including a hill - before your first touring day. This is also when you'll discover anything packed in the wrong pocket or digging into your knee on every pedal stroke.
Weather Protection and Access Strategy
Rain rarely announces itself on tour. A waterproofing system that requires stopping and unpacking three layers to reach your jacket is one you'll avoid using - then regret. Organize each bag so your rain jacket, arm warmers, and an emergency snack sit in external pockets or at the very top of the relevant bag, accessible in under 30 seconds.
Pack by Zone, Not by Category
Rather than grouping 'all clothing together,' think in access zones: camp gear you won't touch until evening goes deep; snacks, rain jacket, and phone go in external or top pockets. This habit alone cuts the time you spend digging at the roadside significantly.
Overloading the Handlebar Roll Affects Steering
Weight ahead of the front axle amplifies steering input and can make a bike feel nervous at speed or on descents. Keep the handlebar roll to bulky-but-light items like a sleeping bag or puffy jacket, and resist the urge to stuff it with tools or food. If your front end feels vague or the wheel flops, the roll is too heavy.
For riders planning tours across changing seasons or mixed conditions, the same principles that apply to seasonal road-trip gear planning apply here: what works in summer may be genuinely inadequate in autumn mountain weather. Build your kit around the worst expected conditions, not the average forecast.