What OBD-II Diagnostics Actually Tell You
The On-Board Diagnostics II (OBD-II) system is a federally standardized interface built into every US passenger vehicle since the 1996 model year. Its primary purpose is emissions monitoring, but the same system captures a wide range of engine, transmission, and vehicle network faults. When a monitored parameter falls outside its expected range, the ECU stores a Diagnostic Trouble Code (DTC) and - if the condition persists - illuminates the check engine or malfunction indicator light.
Reading these codes yourself doesn't replace a full diagnosis, but it gives you a concrete starting point. You'll know which system triggered the fault, which often tells you whether the job is within DIY range or warrants a shop. For a broader framework on tackling your own maintenance, see the complete DIY vehicle maintenance guide.
OBD-II Scanner or Code Reader
Connects to the diagnostic port and retrieves stored and pending fault codes from the vehicle's ECU.
Smartphone with OBD-II App (Bluetooth adapter variant)
An alternative to a dedicated scanner - a Bluetooth OBD-II adapter pairs with a compatible app to display live data and codes.
Vehicle-Specific Service Manual or Reliable Code Database
Provides accurate, manufacturer-specific code definitions beyond the generic SAE descriptions.
Notepad or Phone Camera
For recording exact code strings before clearing them, so you have a reference for diagnosis.
Step-by-Step: Reading Fault Codes at Home
The process is straightforward with the right equipment. Review the prerequisites below before connecting your scanner, then follow each step in sequence. Skipping steps - particularly recording codes before clearing them - is the most common mistake first-timers make.
What you will need
Locate the OBD-II Diagnostic Port
The OBD-II port - formally called the Data Link Connector (DLC) - is a 16-pin trapezoidal socket required by federal regulation to be within 3 feet of the steering column, typically under the dashboard on the driver's side. On most vehicles it's accessible without tools. Check near the fuse panel area or beneath a small plastic cover if it isn't immediately visible.
Connect Your Scanner With the Ignition Off
Plug the scanner firmly into the DLC port. The connector is keyed so it only fits one way. For dedicated handheld scanners, the device typically powers on automatically through the port. For Bluetooth adapters, pair the adapter to your phone app before proceeding. Do not start the engine yet.
Turn the Ignition to the 'On' Position (Key On, Engine Off)
Turn the ignition key to the On position without cranking the engine. On push-button start vehicles, press the start button without pressing the brake pedal - consult your owner's manual if the procedure differs. This powers the vehicle's ECU (Engine Control Unit) and allows the scanner to communicate with it.
Retrieve Stored and Pending Fault Codes
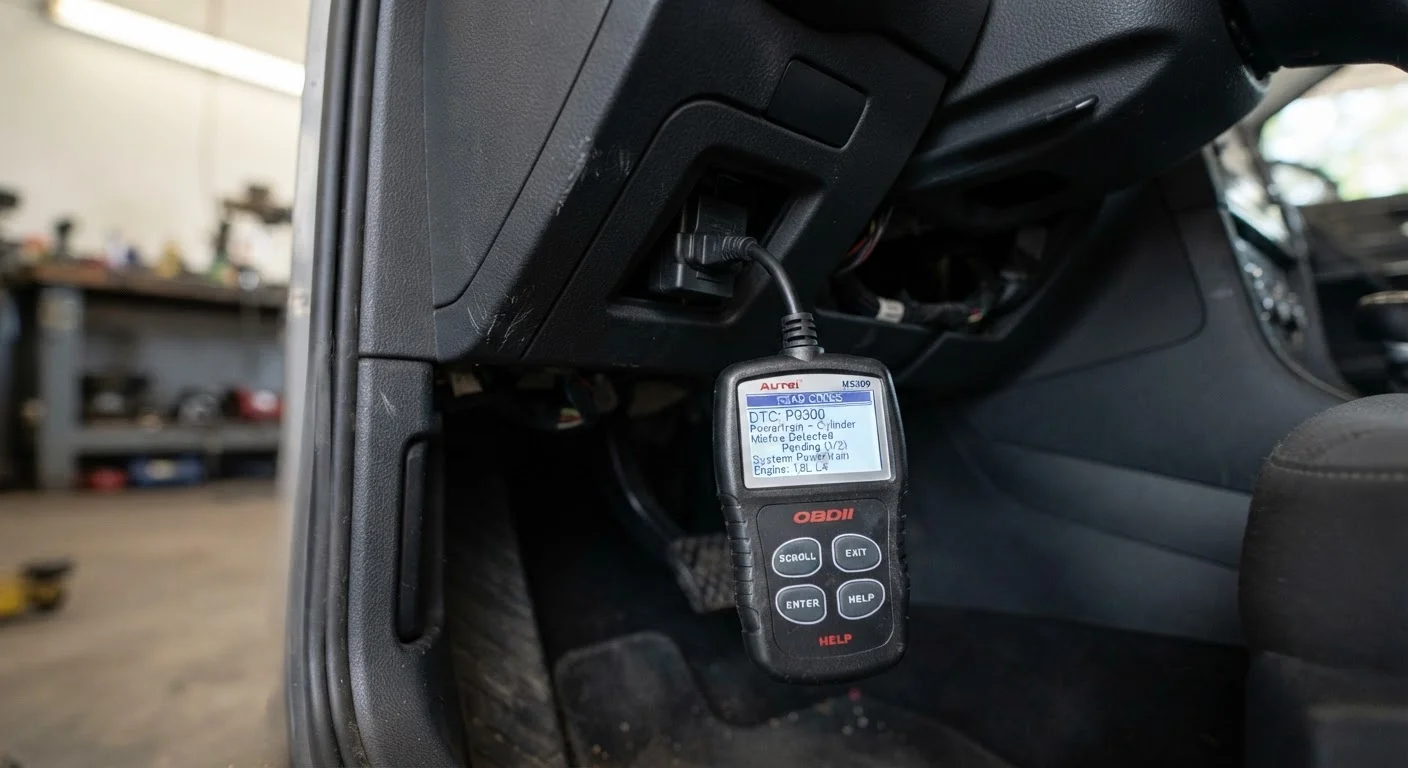
Navigate the scanner menu to Read Codes or Diagnostic Trouble Codes (DTCs). The scanner will display any stored codes (faults that triggered the check engine light) and pending codes (faults detected but not yet persistent enough to illuminate the light). Record every code shown - including the full alphanumeric string - before taking any further action.
Interpret the Code Structure
OBD-II codes follow a standardized format: a letter followed by four digits. The letter indicates the system - P (Powertrain), B (Body), C (Chassis), or U (Network/Communication). The first digit indicates whether the code is SAE-generic (0) or manufacturer-specific (1). The remaining digits narrow down the subsystem and specific fault.
For example, P0420 indicates a generic powertrain code related to catalyst system efficiency below threshold (Bank 1). Oxygen sensor faults like P0131 or P0141 are also common and relate directly to the emissions feedback loop. Dashboard warning lights often illuminate in response to exactly these stored codes.
Research and Diagnose Before Clearing
Look up each code using a vehicle-specific source. The SAE definition gives you a system and symptom category; the actual cause may range from a loose gas cap (common with P0455) to a failing sensor or a mechanical fault. Codes narrow the search - they don't identify the exact failed part. Investigate the most likely causes for your vehicle's year, make, and mileage before deciding on a repair path.
Clear Codes Only After the Fault Is Addressed
Once a repair is made, return to the scanner menu and select Clear Codes or Erase DTCs. The check engine light should extinguish. Then drive the vehicle through a normal cycle to allow readiness monitors to complete. If the same code returns, the underlying fault was not fully resolved.
Don't Clear Codes Before an Emissions Test
Clearing fault codes also resets your vehicle's readiness monitors - the internal self-checks the emissions system runs. Most state inspection programs will fail a vehicle if those monitors haven't completed their cycles. Allow at least 50-100 miles of mixed driving after clearing codes before scheduling an emissions test.
Active Misfires and Safety-Critical Codes
Codes related to misfires (P030X series), brake systems, or transmission faults should not be dismissed or temporarily cleared. Driving with an active misfire can cause catalytic converter damage within a short distance. If a code returns immediately after clearing, treat it as a current fault requiring prompt attention.
Acting on What You Find
A fault code is a structured clue, not a repair order. Once you've identified the code and researched its likely causes, you have a decision to make: attempt the repair yourself, or hand it to a professional. Simple faults - a loose gas cap, a failed mass airflow sensor, a worn spark plug - are well within reach for a home mechanic with basic tools. Spark plug condition is itself a useful diagnostic layer once you're already investigating a misfire code.
More complex faults involving the transmission control module, ABS system, or internal engine components typically require specialized equipment and expertise beyond what an OBD-II scanner provides. In those cases, the value of reading the code yourself is knowing exactly what to tell the shop - which saves diagnostic time and gives you a reference point for evaluating their assessment.
If you're purchasing a used vehicle and a code reader reveals stored faults, correlate that information with the vehicle's documented history. Our guide on reading a vehicle history report explains how to connect service records to what the ECU is telling you.
Cross-Reference Codes With a Reliable Database
The SAE-standardized code definitions are a starting point, but manufacturer-specific codes (those beginning with P1, B1, C1, or U1) require a vehicle-specific database. Your vehicle's factory service manual or a reputable OBD-II code lookup resource will give you more accurate context than a generic description alone.