What Each Filter Actually Does
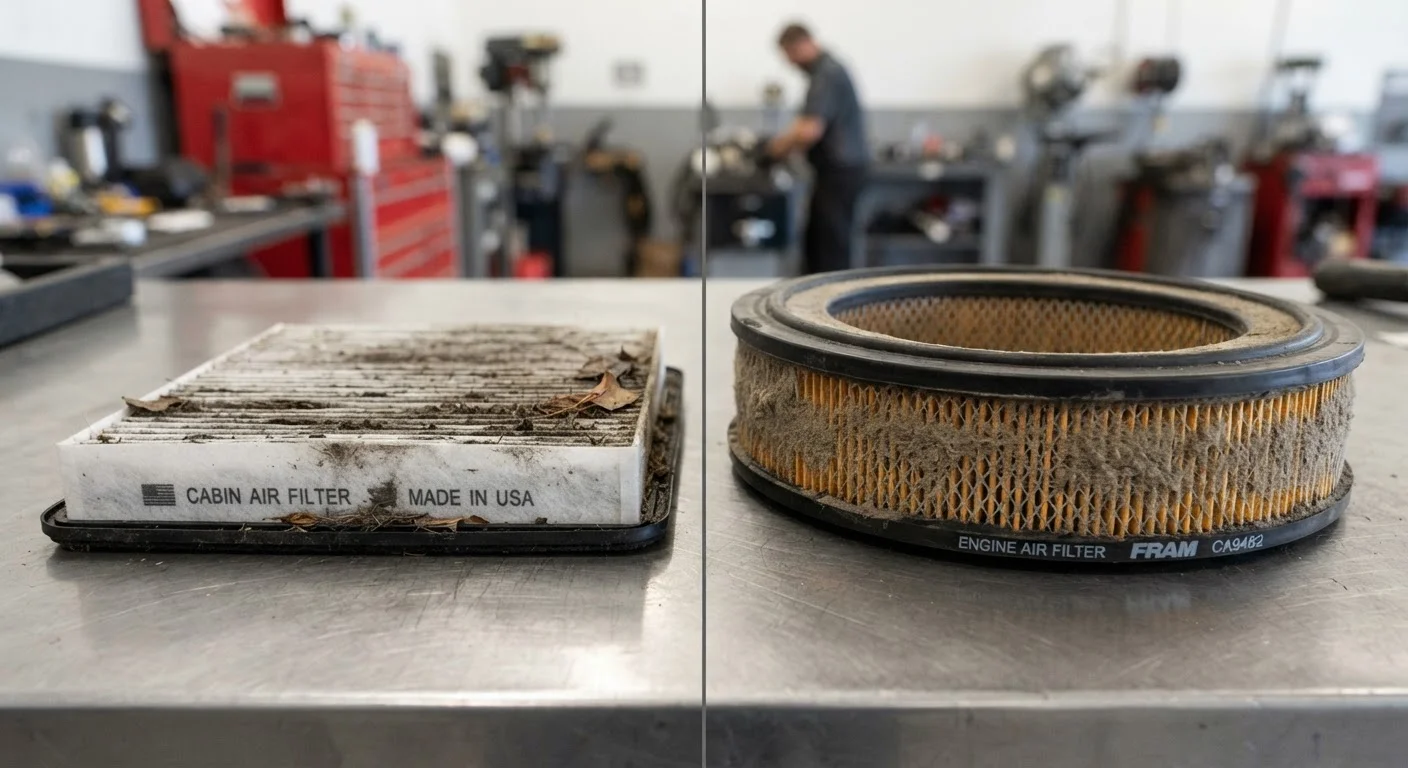
Despite their similar appearance - a pleated rectangular panel of filter media - the cabin air filter and the engine air filter do entirely different jobs and are not interchangeable.
The engine air filter sits between the outside air intake and the engine's throttle body or carburetor. Its job is to trap dust, dirt, insects, and debris before they enter the combustion chamber. Abrasive particles that bypass a failed filter can score cylinder walls and accelerate wear on pistons and rings - damage that compounds quietly over thousands of miles.
The cabin air filter sits in the HVAC (heating, ventilation, and air conditioning) system, typically behind the glove box or under the dashboard. It filters air before it enters the passenger compartment, trapping pollen, mold spores, fine dust, and exhaust particulates. It has no effect on engine performance whatsoever - its purpose is occupant air quality and system airflow.
Understanding this distinction matters when diagnosing symptoms. Reduced HVAC airflow or musty odors point to the cabin filter. Sluggish throttle response or a rich-running engine more likely involves the engine filter or other intake components. See the Parts Explained hub for deeper breakdowns of how these and other components interact.
Replacement Intervals: What the Numbers Say
Both filters follow condition-based and mileage-based guidelines, and driving environment plays a significant role in how quickly either degrades.
| Cabin Air Filter | Engine Air Filter | |
|---|---|---|
| Primary function | Filters passenger compartment air | Filters intake air for combustion |
| Typical replacement interval | 15,000-25,000 miles or 1 year | 15,000-30,000 miles |
| Location | Behind glove box or under dash | Engine bay intake housing |
| Symptom of neglect | Weak HVAC flow, musty odors | Reduced power, poor fuel economy |
| DIY difficulty | Easy on most vehicles | Easy on most vehicles |
| Affected by driving environment | High pollen, smoke, dust areas | Unpaved roads, dusty conditions |
These ranges assume mixed driving. Dusty gravel roads, heavy urban traffic with stop-and-go idling, wildfire smoke, or high-pollen seasons can cut effective filter life substantially. If you're unsure whether to follow mileage or calendar intervals, the mileage vs. time maintenance guide explains how to weigh both triggers against each other.
Check Both Filters at Every Oil Change
Many shops focus on engine components during a standard oil service, but cabin filters are rarely on their checklist unless you ask. Make it a habit to inspect or request inspection of both filters every time you're under the hood or at a lube shop. Catching a saturated filter early is far cheaper than dealing with downstream problems.
How to Inspect Each Filter
Visual inspection is simple and takes under five minutes for each filter once you locate the housing.
Engine Air Filter
- Locate the air filter housing - typically a black plastic box connected to a large intake tube near the front of the engine bay.
- Unclip or unscrew the housing cover (usually no tools required, or a flathead screwdriver).
- Remove the filter and hold it up to a light source. A new filter is white or light gray. Heavy gray-to-black loading across more than half the filter surface indicates it's due for replacement.
- Tap the filter gently over a trash can to dislodge loose debris and get a clearer view of the media condition.
Cabin Air Filter
- On most vehicles, access is behind the glove box. Open the box, press in the sides to release the stops, and lower it to reveal the filter housing.
- Slide out the filter and inspect it under good lighting. Leaf debris, insects, matted dust, or a noticeably compressed pleated structure all indicate replacement is needed.
- A filter that smells musty even before installation may indicate mold growth in the HVAC housing itself - worth noting for your mechanic.
The overlooked replacement intervals article covers cabin air filters alongside several other components that tend to slip through routine service checklists.
Don't Use Compressed Air to 'Clean' Either Filter
It's tempting to blow out a dirty filter with an air compressor, but this can damage the filter media and force embedded contaminants deeper into the pleats rather than removing them. Once a filter is visibly dirty or past its service interval, replacement is the correct approach - not cleaning. Engine air filters in particular should never be reused once compromised, as even small tears in the media allow unfiltered air into the intake.
DIY vs. Shop: Making the Call
Both filters are widely considered beginner-friendly DIY maintenance tasks. Filter housing access on most modern vehicles is designed to be tool-free or require only basic hand tools. Replacement typically takes 10-15 minutes once you've located the housing and sourced the correct filter for your year, make, and model - always verify fitment against your owner's manual or a reliable parts catalog.
That said, a few situations warrant shop involvement:
- Unusual HVAC symptoms after filter replacement - persistent odors, weak airflow, or moisture inside the cabin can indicate a clogged evaporator drain or mold in the ductwork, not just a dirty filter.
- Engine performance issues that persist after filter replacement - rough idling, poor fuel economy, or a check-engine light alongside air filter symptoms may point to a mass airflow sensor (MAF) that needs cleaning or replacement.
- Limited access on specific models - some vehicles (particularly certain SUVs and trucks) route the cabin filter through locations that require dashboard disassembly. If your owner's manual lists more than a few steps, professional service is a reasonable choice.
As a general principle, filters are among the lowest-cost, highest-return maintenance items on any vehicle. Staying on top of both protects your engine, keeps interior air clean, and avoids the compounding costs that come from deferring simple preventive work.