Why Solar Output Rarely Matches the Nameplate Rating
Panel wattage ratings are measured under Standard Test Conditions - 1,000 W/m² of irradiance, 25°C cell temperature, and a specific air mass index. Real RV rooftops rarely hit those numbers simultaneously. Add partial shading, suboptimal tilt angles, heat buildup on a dark roof, and an incorrectly configured charge controller, and it's common for a system to deliver 50-70% of its theoretical capacity on an average day.
That gap isn't a defect - it's physics and installation. The good news is that most of the shortfall is recoverable by addressing specific, identifiable mistakes. For broader context on how solar fits into your overall power strategy, see how solar compares to shore power and generators before assuming more panels are the answer.
The Most Common Solar Charging Mistakes
The following errors account for the majority of underperformance complaints from RV solar owners. Each has a clear cause and a practical fix - no specialized tools beyond a basic multimeter and your controller's configuration menu.
Ignoring partial shading across the panel array.
Why it happens: Owners focus on total panel wattage and assume full-sun ratings translate directly to real-world output, underestimating how a single shaded cell affects series-wired panels.
Using a PWM controller with panels rated for an MPPT system.
Why it happens: PWM (Pulse Width Modulation) controllers are less expensive and widely available, so budget-conscious builders sometimes install them with higher-voltage panel strings where an MPPT (Maximum Power Point Tracking) controller would extract significantly more power.
Setting the wrong battery chemistry profile on the charge controller.
Why it happens: Controllers often ship with flooded lead-acid as the default. Owners with AGM or lithium iron phosphate (LiFePO4) banks sometimes overlook reprogramming this setting during installation.
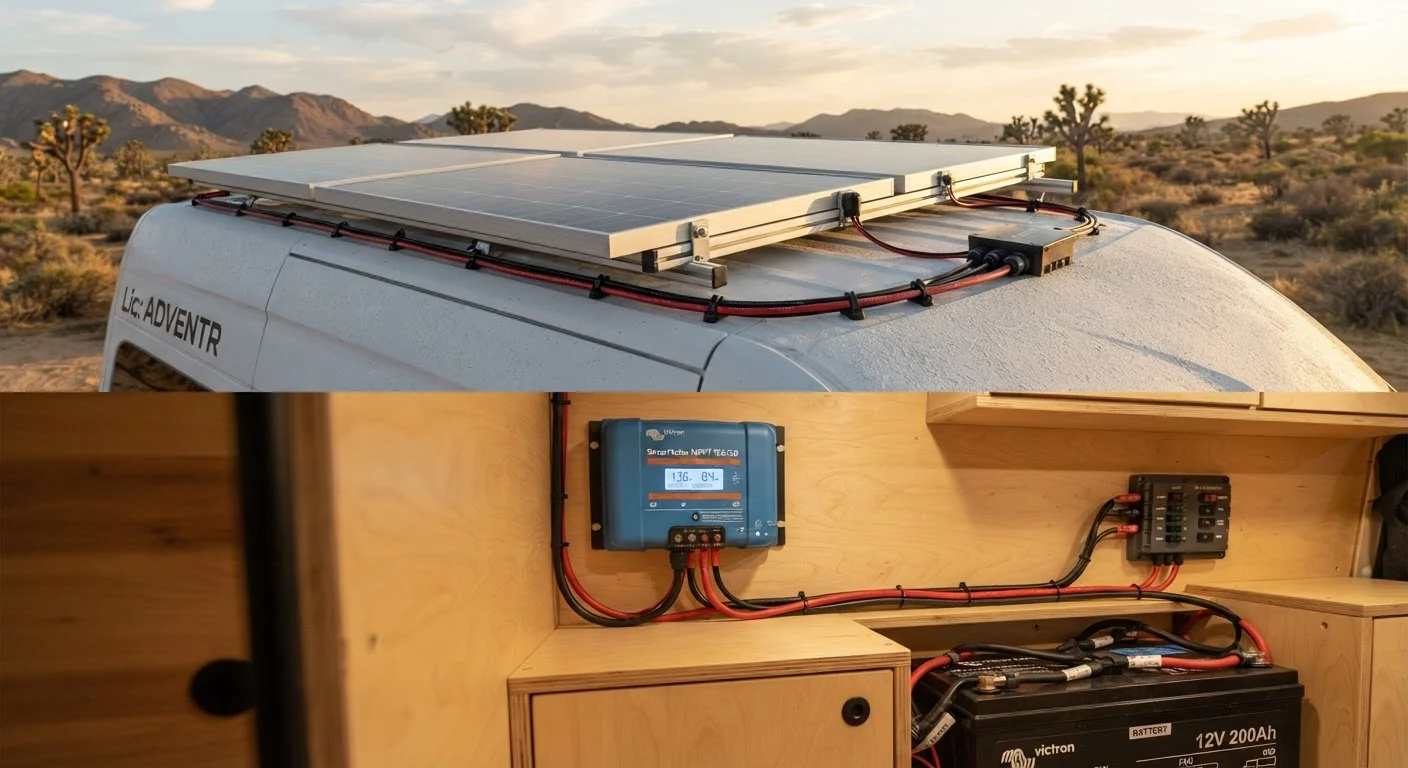
Undersizing wire gauge or running excessively long cable runs.
Why it happens: Wire sizing is often treated as an afterthought, with builders reusing whatever cable is on hand. Resistance increases with length and decreases with wire gauge - both variables are easy to miscalculate.
Placing the charge controller in a poorly ventilated compartment.
Why it happens: Compact RV interiors make ideal mounting spots hard to find, and thermal management is rarely top of mind during installation.
Overlooking parasitic loads draining the battery overnight.
Why it happens: Solar output is measured during daylight, but owners attribute a low morning state-of-charge solely to insufficient panel capacity rather than investigating what drew current overnight.
Battery Damage From Wrong Charge Settings
Applying the incorrect charge voltage profile for your battery type - for example, using flooded lead-acid settings on a lithium battery bank - can result in chronic undercharging or, in some cases, accelerated cell degradation. Always verify that your charge controller's battery type setting matches your installed battery chemistry before running the system.
If you're managing multiple power sources and loads simultaneously, understanding how inverters and 12V sockets interact with your solar bank can help you prioritize where your charging capacity actually goes.
How to Actually Measure What Your System Is Doing
Don't Diagnose by Feel Alone
Many solar charging problems produce no visible symptoms - panels look fine, lights still work, and the controller shows a green indicator. Relying on indicator lights without checking actual voltage and current readings with a multimeter or battery monitor can mask chronic undercharging that quietly shortens battery life over months.
20-30%
Potential energy gain switching PWM to MPPT
Industry technical literature on charge controller types consistently cites this range under real-world conditions with mismatched panel-to-battery voltage ratios.
~3%
Maximum acceptable voltage drop in wiring
Standard electrical engineering guidance for 12V DC solar systems recommends keeping voltage drop below 3% to avoid meaningful efficiency losses.
A battery monitor that reads both voltage and cumulative amp-hours is the most useful diagnostic tool in an RV solar setup. Voltage alone is a lagging indicator - a 12.6V reading at rest looks healthy, but it tells you nothing about charge rate, daily throughput, or overnight draw. Monitors that log amp-hours in and out let you verify that your panels are delivering what you expect and that your loads aren't quietly exceeding your generation capacity.
For a deeper look at what's happening inside the battery itself - separate from the solar charging side - battery health habits that shorten service life covers the degradation patterns most owners don't notice until capacity is already compromised. And for anyone building out a full off-grid rig, living off-grid in an RV puts the solar system in context alongside water and waste management.
This article is for general informational purposes. Electrical system modifications should be evaluated against your specific components and, where you're uncertain, reviewed by a qualified RV technician or licensed electrician.